In running a completely distributed agency, I spend a signficant portion of my day on video calls. Like, most days, the majority of my day. So, if my colleagues and I have to spend a lot of time looking at my mug, I might as well try to make that a more pleasant experience for everyone involved.
The initial inspiration for this goes to Aaron Shekey. I saw a tweet of his that talked about switching from a built-in webcam to a proper camera, and I was immediately off to research how to do this. Luckily, he wrote a post about his setup, and I’m doing most of the things he is, with a few minor modifications. Thanks for all of this, Aaron!
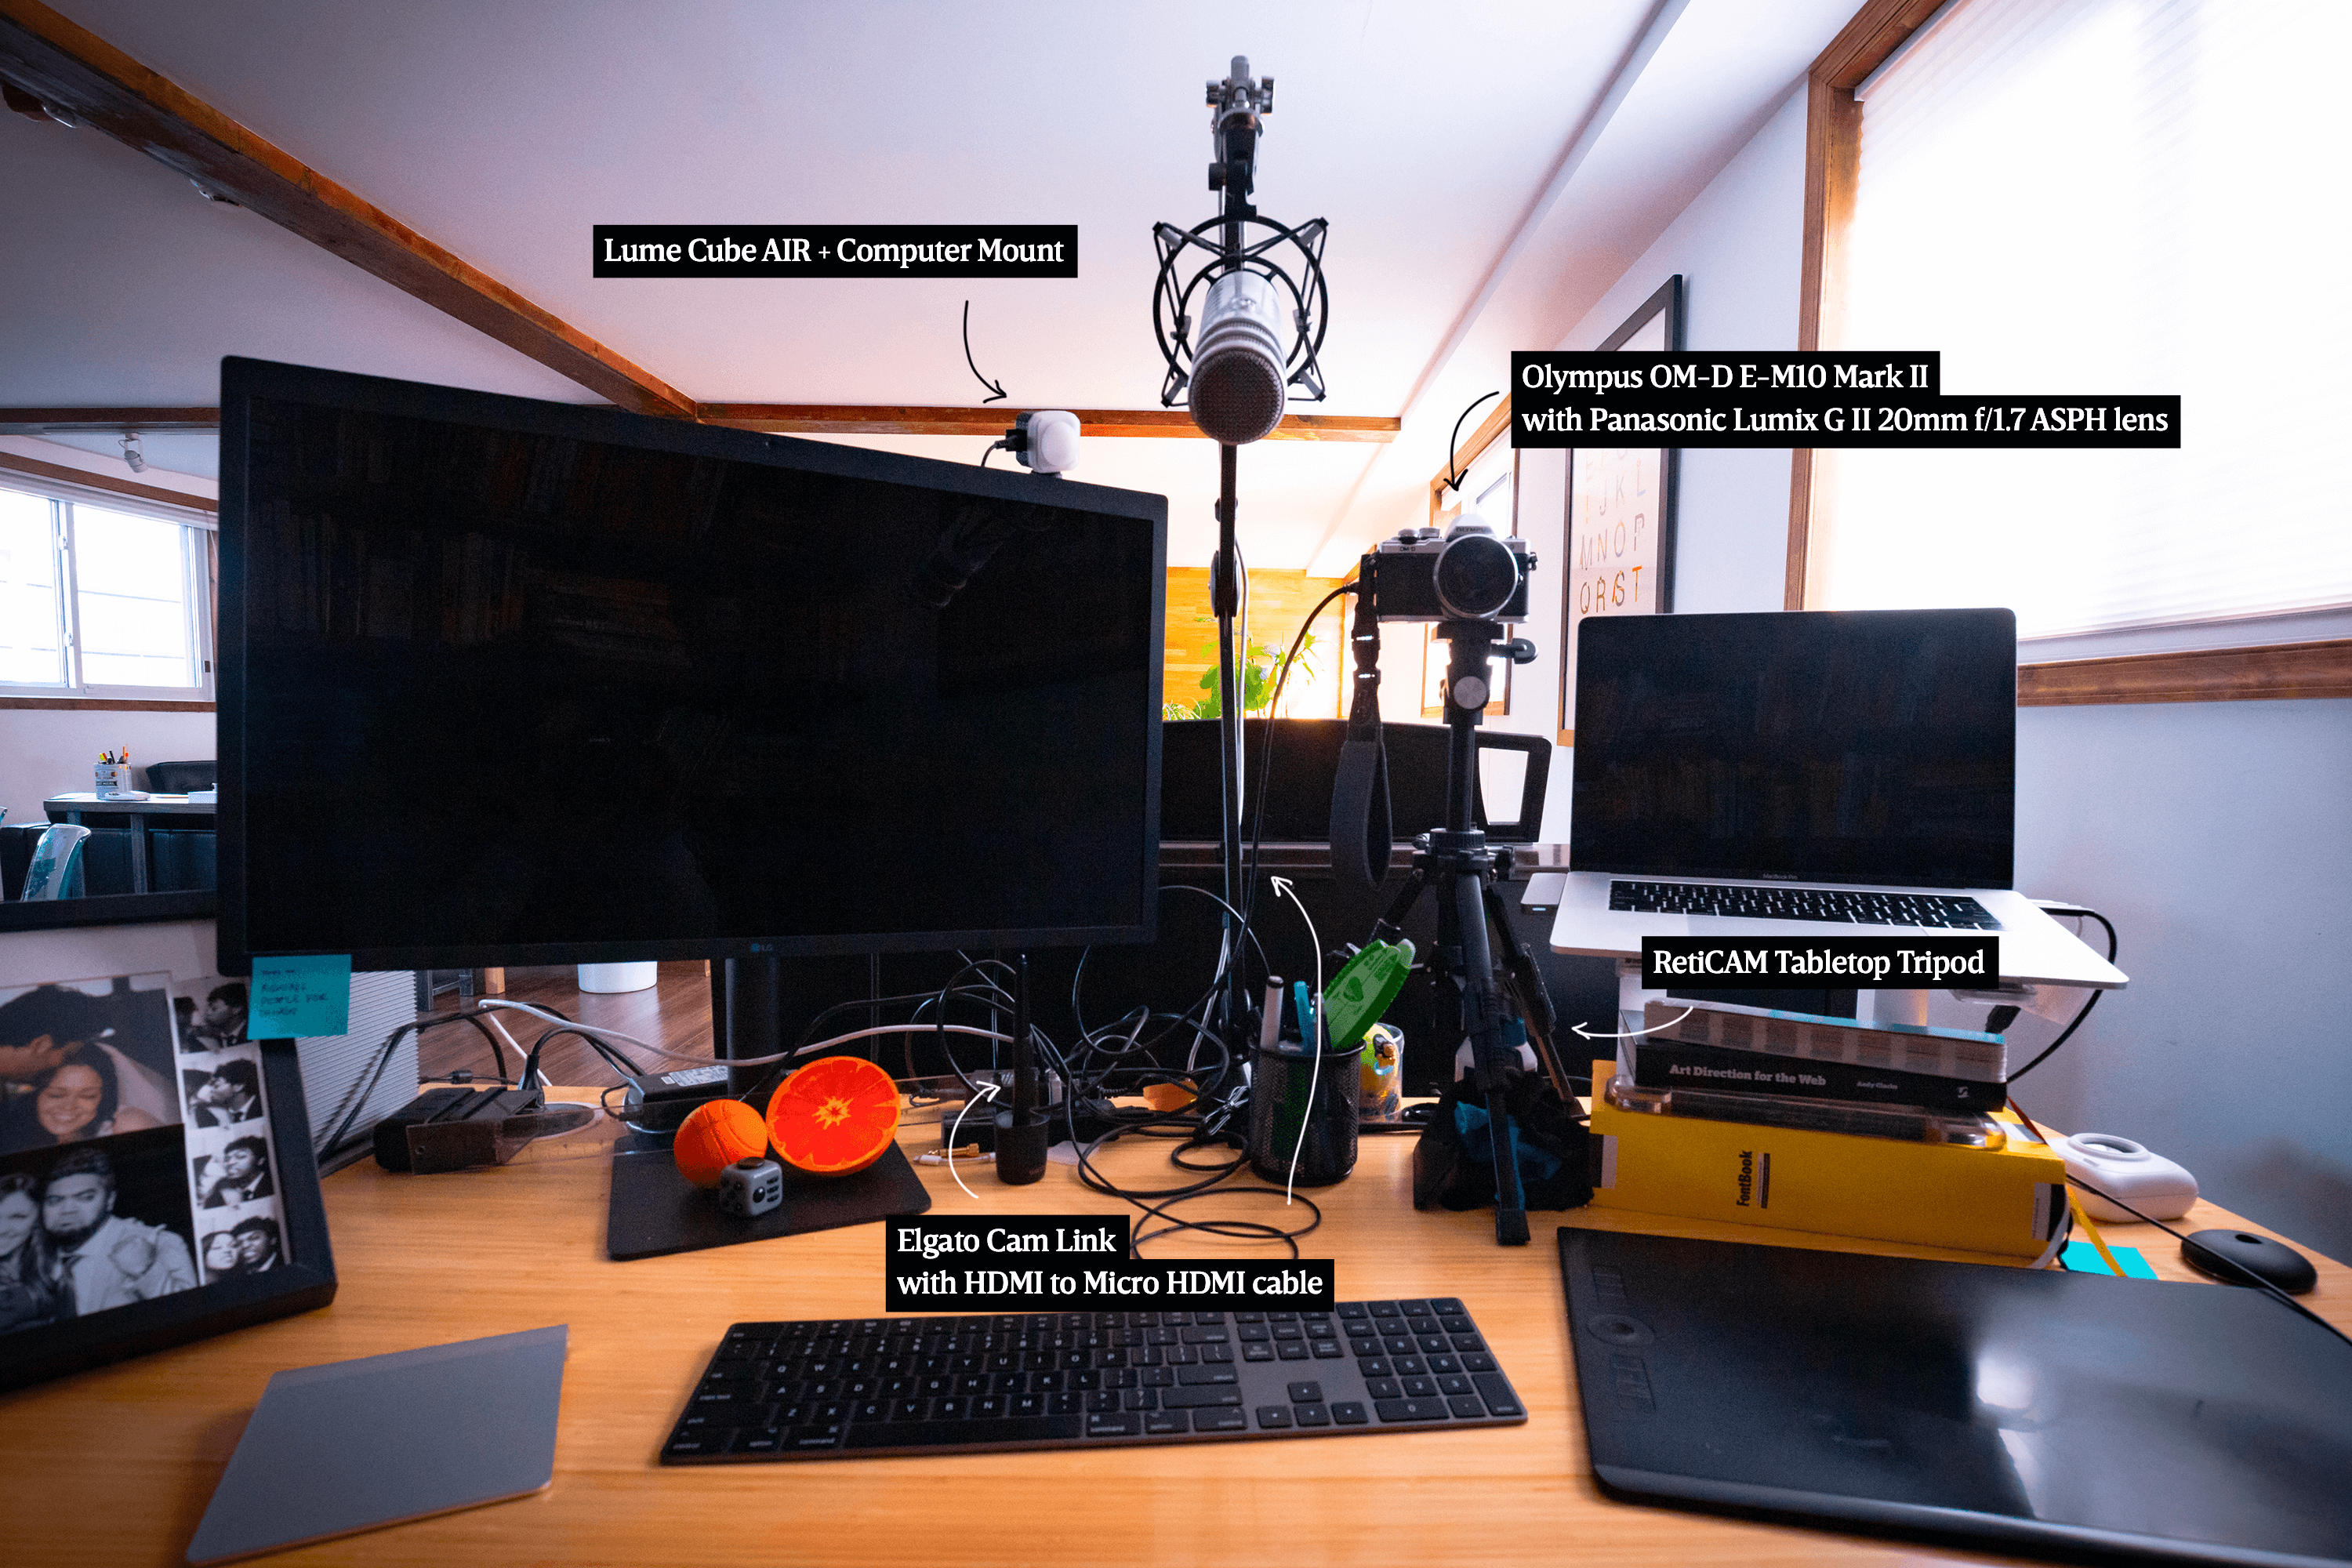
Here’s my desk setup and all the equipment I use:

- Olympus OM-D E-M10 Mark II
- Panasonic Lumix G II 20mm f/1.7 ASPH lens
- Elgato Cam Link
- HDMI to Micro HDMI Cable
- Two spare Olympus BLS-50 lithium ion batteries and two spare Olympus BCS-5 battery chargers
- RetiCAM Tabletop Tripod
- Lume Cube AIR + Computer Mount
I use an Olympus mirrorless camera for my webcam with a pancake lens that has a pretty wide aperture (f/1.7) so I can get some pretty shallow depth of field.
The camera is pretty light—which is part of the reason I got this particular camera in the first place—but it’s not light enough to sit on top of a monitor like a typical external webcam. So, I use a tabletop tripod to hold it steady, which also has the added benefit of being able to position it at the exact height as well as place on my desk that I want. Since it’s next to my laptop where I typically leave my video call screen (usually Zoom but occasionally Google Hangouts), it appears to people on the call that I’m looking slightly offscreen. I could look directly into the camera, but then I wouldn’t be able to see the people I’m talking to, which is what I prefer. I may tweak this setup in the future to see if I can achieve both simultaneously.
The Elgato Cam Link with HDMI to Micro HDMI cable is what makes all of this possible. (If you’re using a different camera, be aware that you might need a HDMI to Mini HDMI cable instead of a HDMI to Micro HDMI cable.) Once it’s set it, you can switch to this camera as a video input just like you would any other webcam (built into a monitor or external).
I typically get about 1½ – 2 hours of straight video time, which is pretty decent. But, since I’m on video calls a lot, I always have 2 spare batteries charging for a quick swap in case a battery dies in the middle of a call.
My studio typically gets a lot of light, so I’m rarely in need of additional lighting to make this setup work. However, for the rare evening video calls, I’ll switch on a Lume Cube mounted behind my external monitor, which does just the trick.
I leave my camera on manual focus. That means when I first join calls, I have to manually adjust the focus ring on my lens to make sure my eyes are sharply focused. (This is why I always keep “Always show video preview dialog when joining a video meeting” enabled by default. Letting people see themselves before you see them is just common courtesy.) I tried using autofocus for a while, but the camera didn’t always get the focus right, and I spent a disproportionate amount of time on calls trying to reset the focus, distracting me from the what I actually wanted to focus on: the conversation.
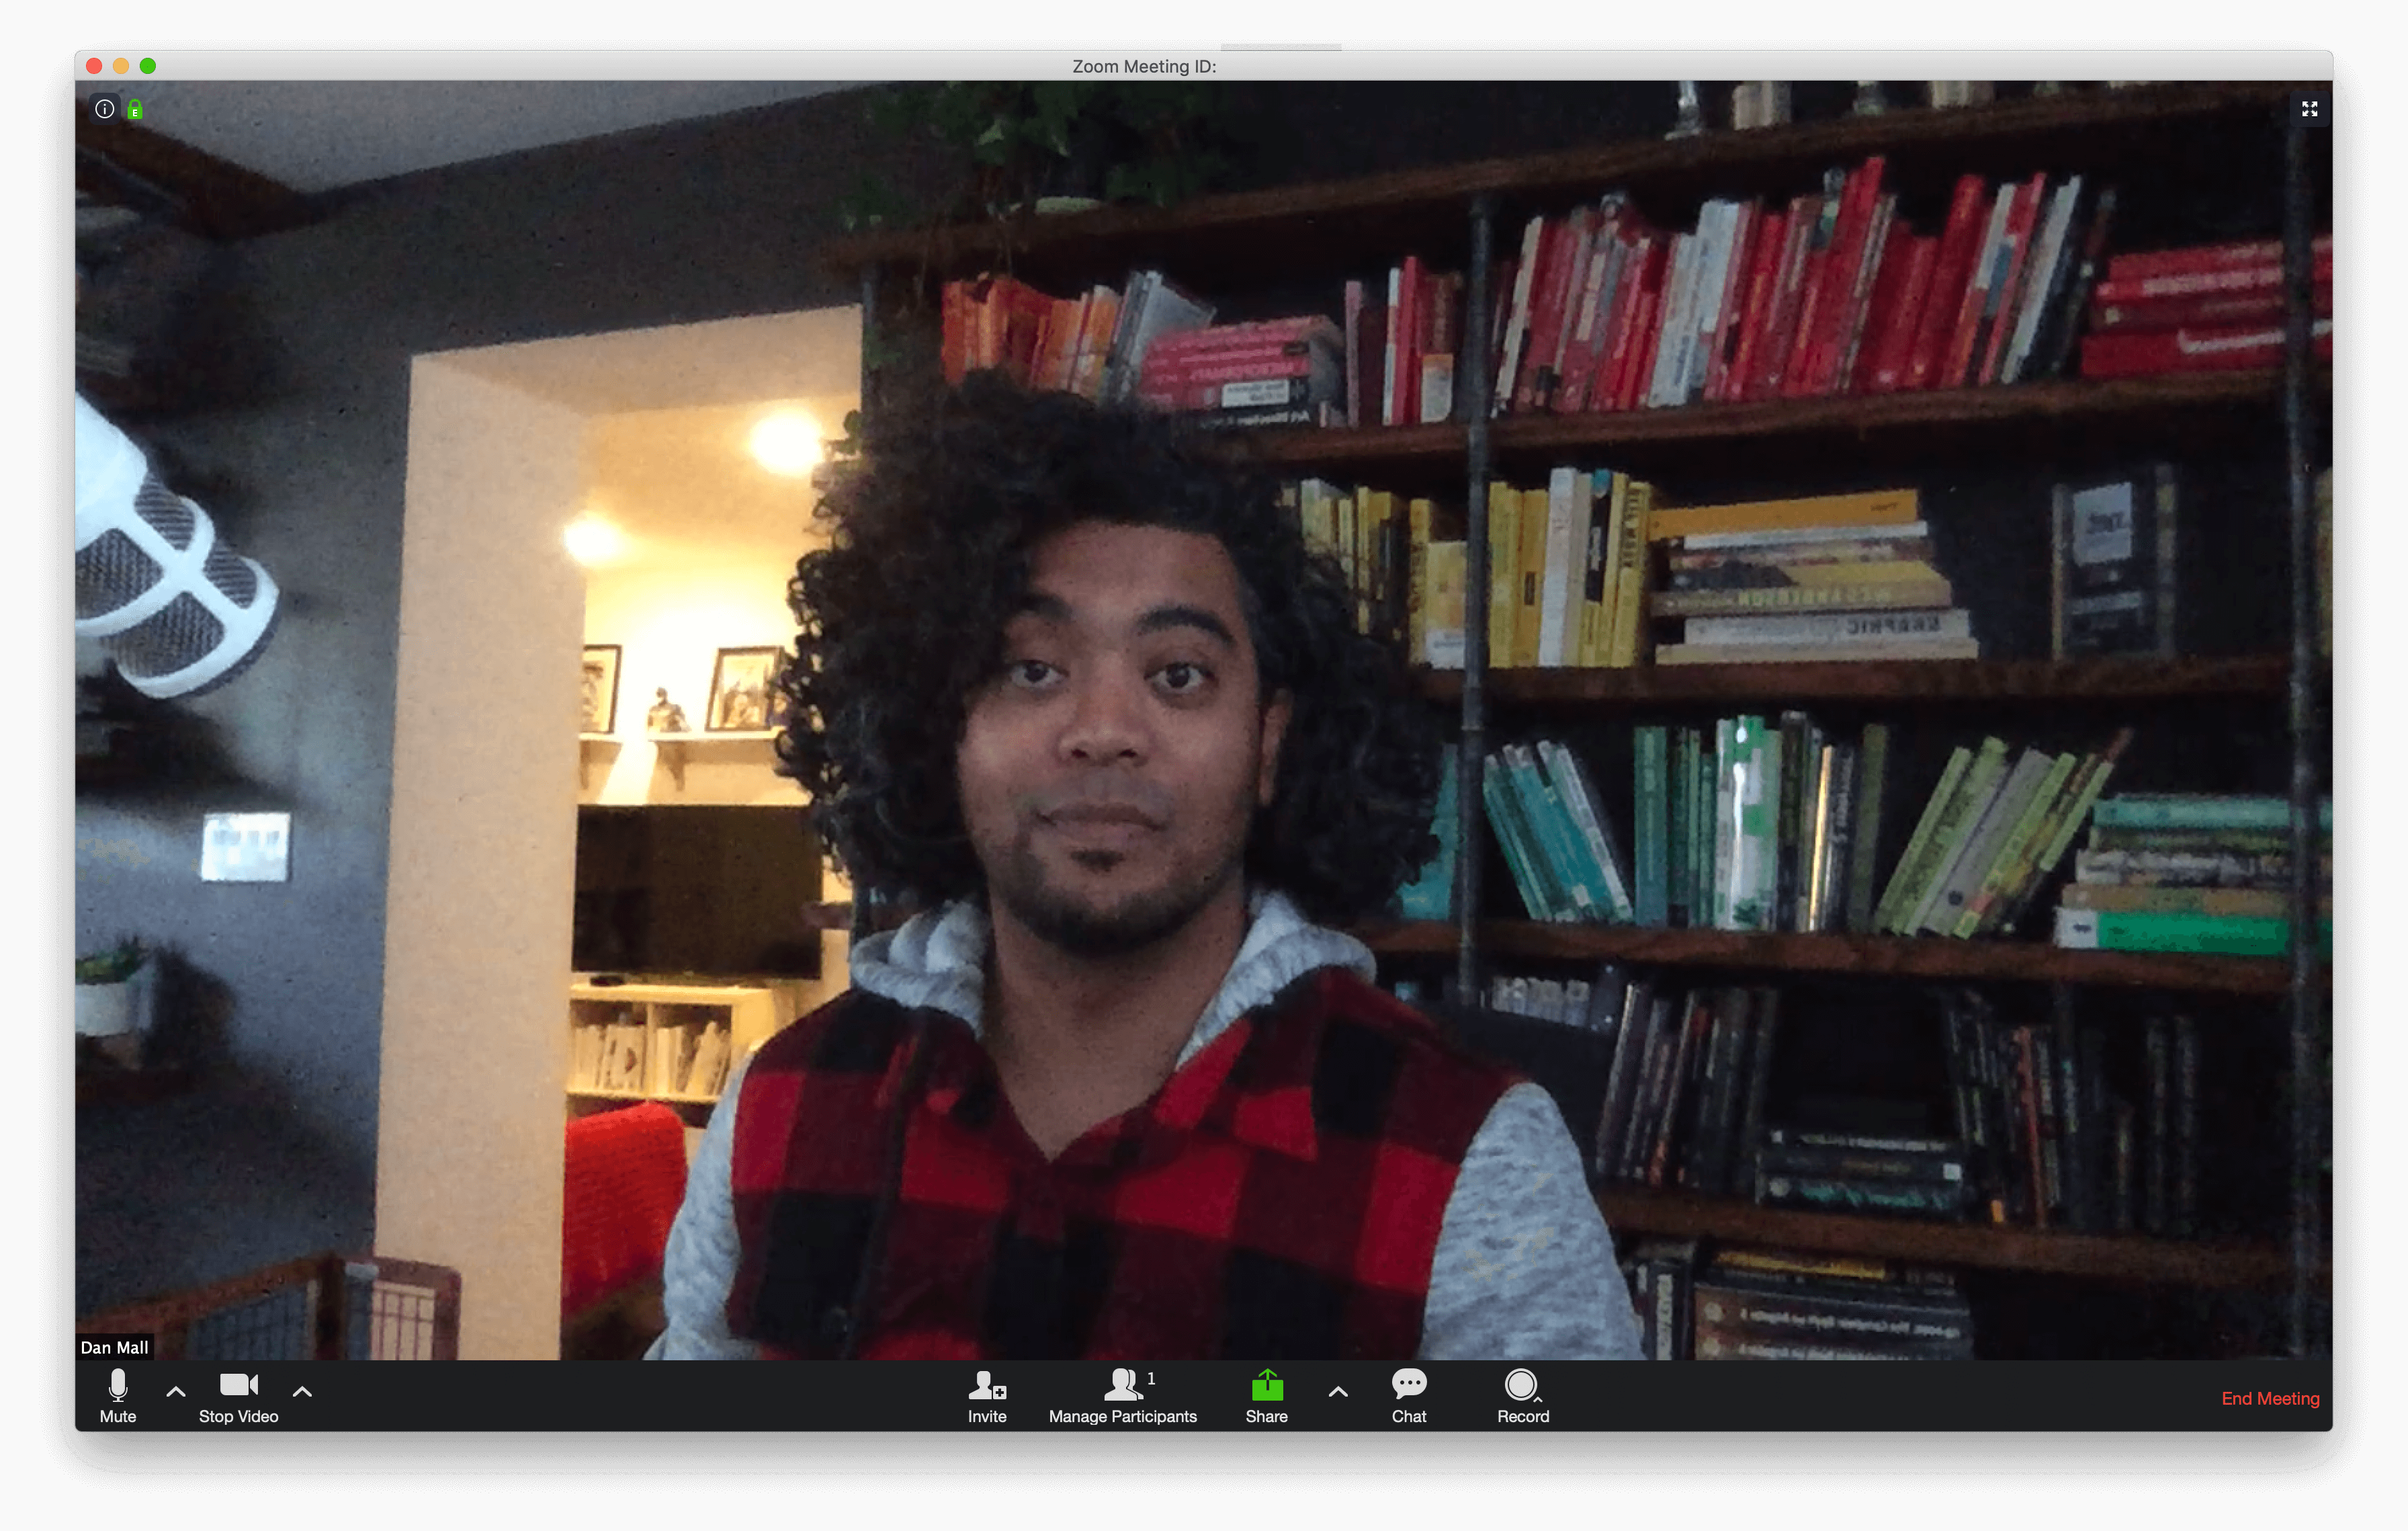
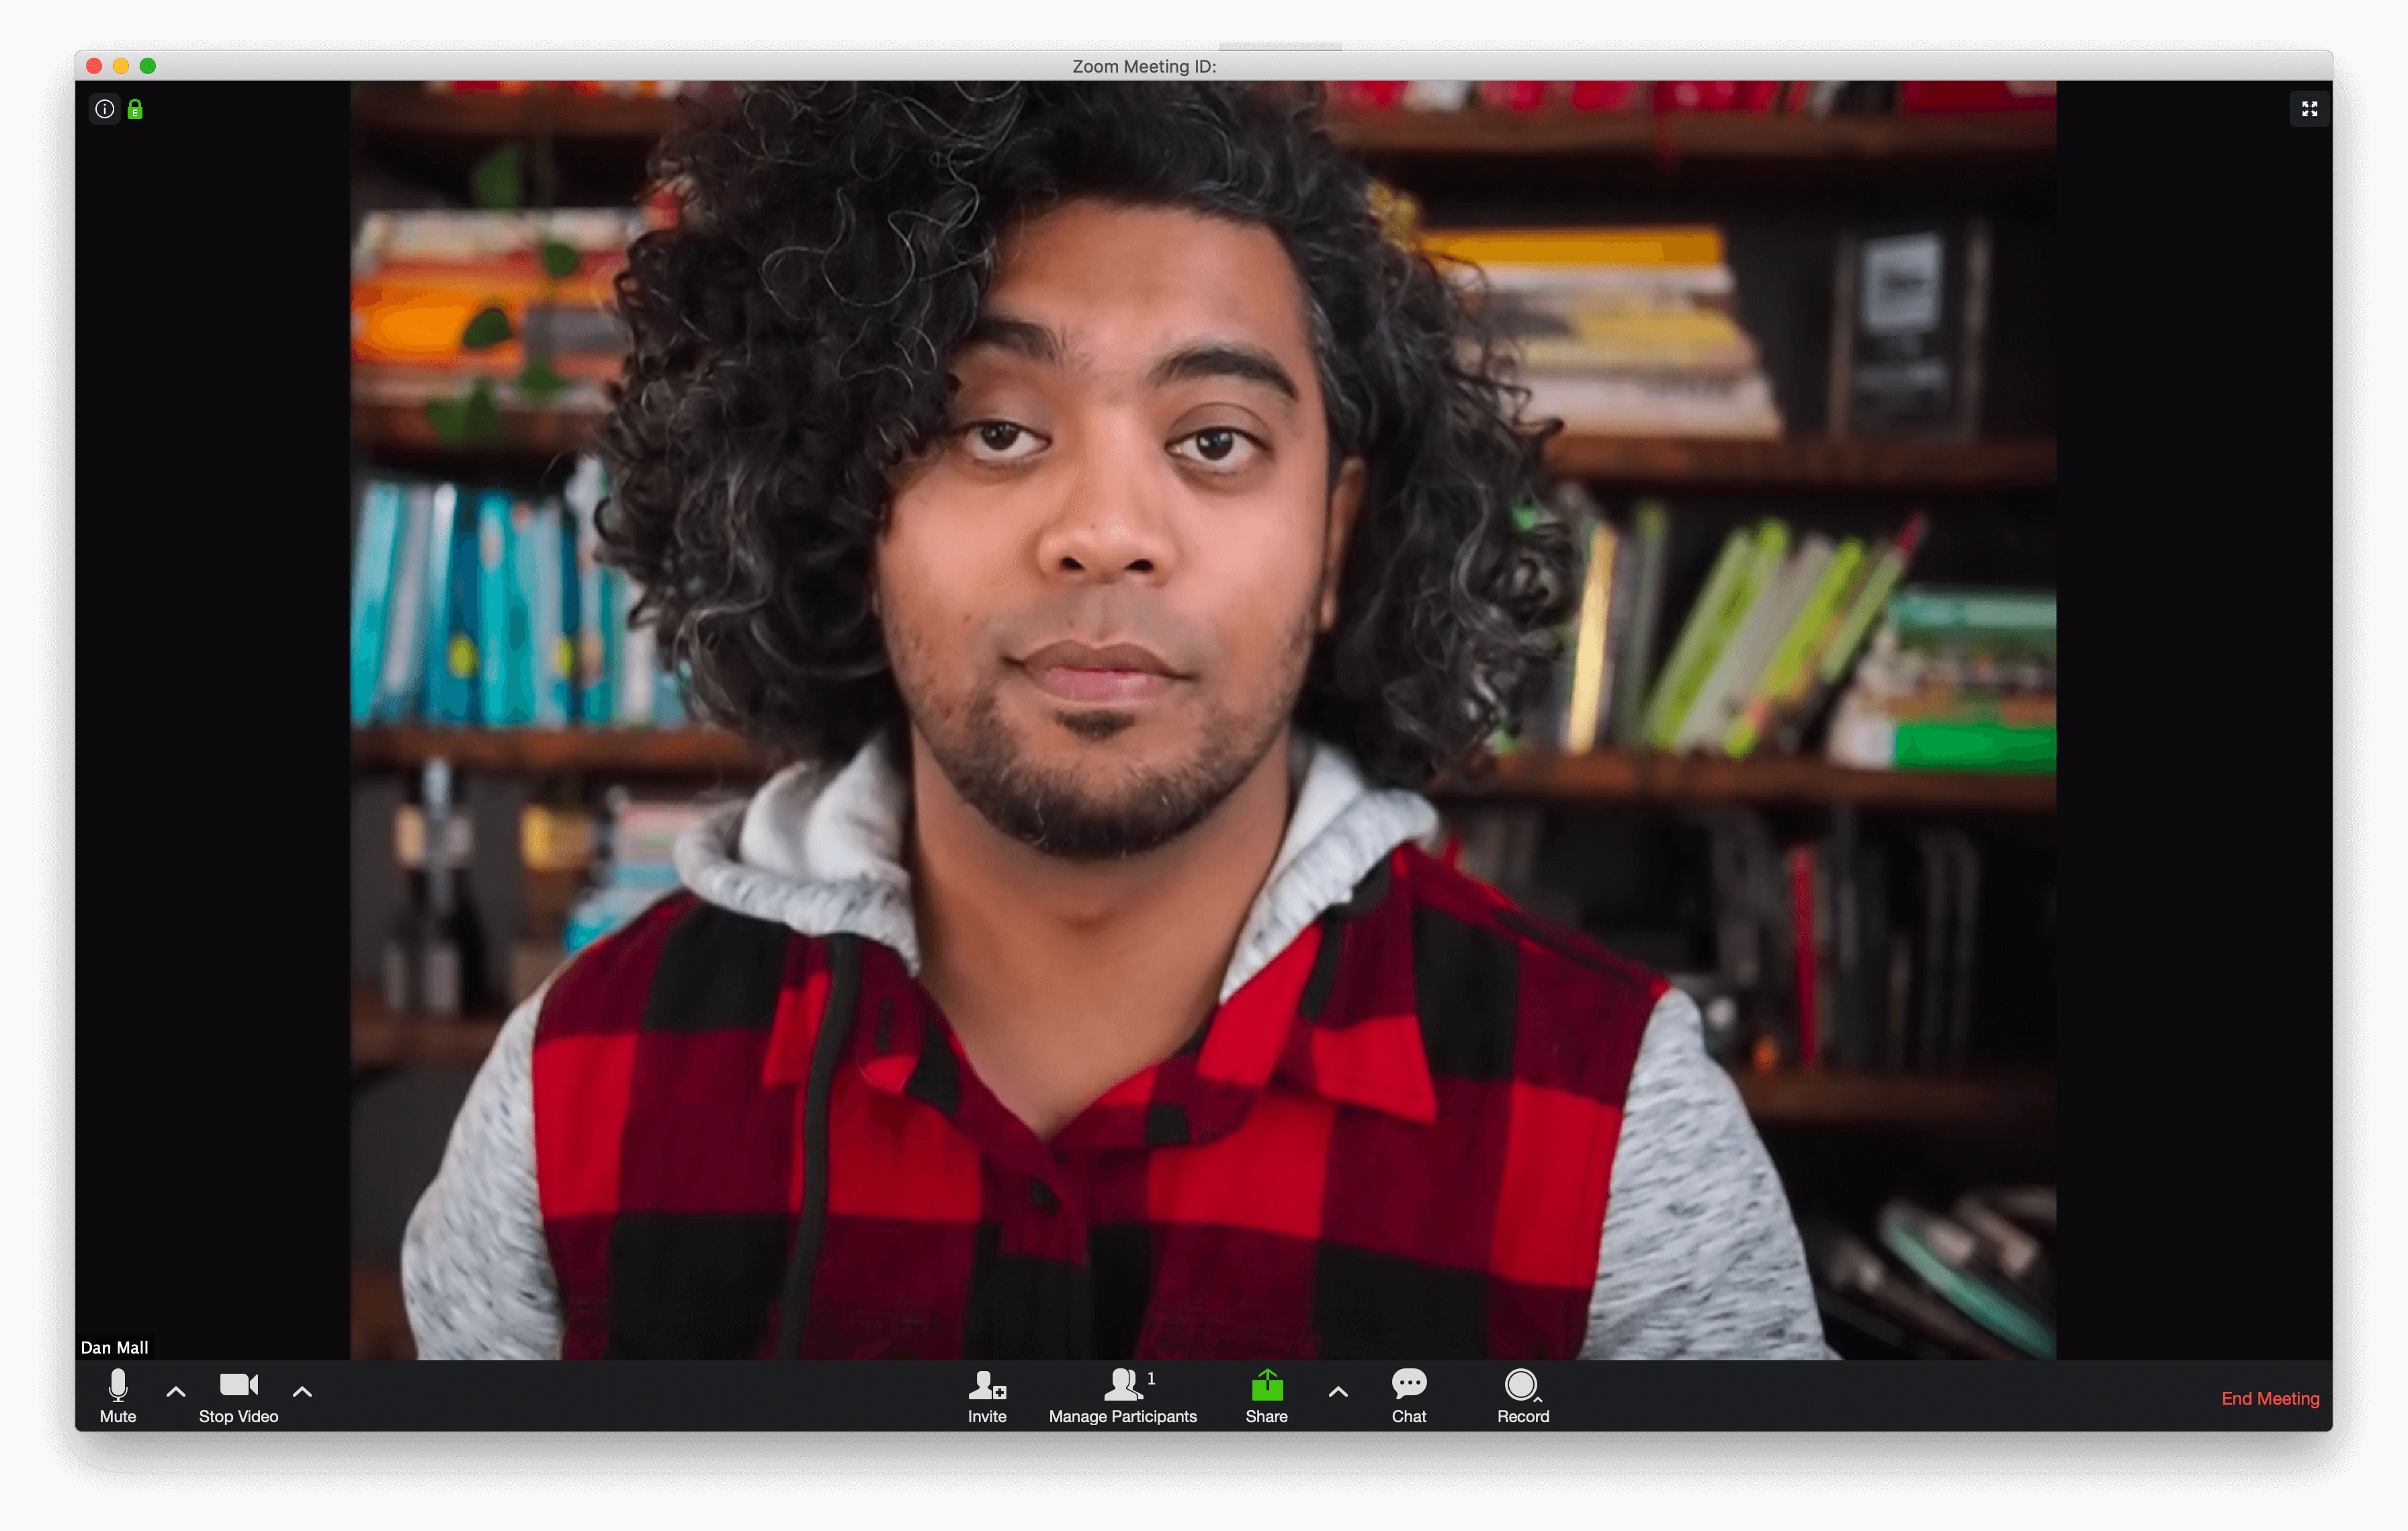
Here’s a comparison between the images that come out of each screen (each screenshot taken from the same Zoom window seconds apart from each other in the same lighting conditions for the most accurate representation):
From my MacBook Pro built-in FaceTime camera:

From my LG 27" UltraFine 5k monitor built-in camera:

From my Olympus camera:

And just for kicks while I was at it, I made a silly in-situ image that displays when my video is turned off:

Is all of this worth it? I think so! While some of this is certainly ego and vanity, it’s also a form of self-care for me. I think the better I think I look, the more confident I feel. And when I feel good, I act good. Without a doubt, that’s worth a couple hundred bucks and a few hours of setup.
Read Next
2019 Year in Review
Join 5,300+ subscribers to the weekly Dan Mall Teaches newsletter. I promise to keep my communication light and valuable!